b) What
are the advantages of non-uniform non-rational B-splines over uniform
non-rational B-splines?
[4]

a) What
is the difference between Go and CO continuity? Explain
the difference between C0, C1, C2 continuity.
Suggest a scheme for approximating a set of 2D points using a curve that
satisfies C2 continuity. [3+3+6]

A breakpoint is where two curve
segments meet within a piecewise curve. The continuity of a curve at a
breakpoint describes how those curves meet at the breakpoint. Figure 8-4 shows four
possible types of continuity:
|
No continuity
|
|
The curves do not meet at all.
|
|
C0 continuity
|
|
The endpoints of the two curves meet (the curves have positional
continuity only). There may be a sharp point where they meet.
|
|
C1 continuity
|
|
|
|
C2
continuity
|
|
The curves have identical curvature at the breakpoint. (Curvature
is defined as the rate of change of the tangents.) Curvature continuity
implies both tangential and positional continuity.
|
The order of a curve determines the maximum continuity possible.
Thus, you may need a higher order curve if you need more continuity. The
maximum continuity is order - 2. For example, for cubic curves, the
maximum continuity possible is C2 (curvature
continuity).

c) Can
you connect two Hermite curves maintaining CI continuity? How? [5]
Curves
and surfaces can have explicit, implicit, and parametric representations.
Parametric representations are the most common in computer graphics.
Reparameterization
Parameterizations
are in general not unique. Consider the following parameterizations for a line:
L(P0,P1) = P0 + u(P1-P0), u = [0...1]
L(P0,P1) = v(P1-P0)/2 + (P1+P0)/2, v = [-1...1]
Parameterizations
can be changed to lie between desired bounds. To reparameterize from u =
[a...b] to w = [0...1], we can use w = (u-a)/(b-a), which gives u = w(b-a) + a.
Thus, we have:
P(u), u = [a...b] =
P(w(b-a)+a), w = [0...1]
Parametric Cubic Curves
Cubic
curves are commonly used in graphics because curves of lower order commonly
have too little flexibility, while curves of higher order are usually
considered unnecessarily complex and make it easy to introduce undesired
wiggles.
A
parametric cubic curve in 3D is defined by:

Usually,
we consider t = [0...1].

A
compact version of the parametric equations can be written as follows:

Similarly, we can write
Similarly, we can write
y(t) = T B
z(t) = T C
Each
dimension is treated independently, so we can deal with curves in any number of
dimensions.
The
derivatives of the curve with respect to t can be expressed as follows:
x'(t) = [3t^2
2t 1 0] A
It
is often convenient to think of the parameter t as being time in order to
visualize some of the properties of the curve. The derivatives also have an
intuitive interpretation in the cartesian space of the curve:

A
First Example
Suppose
we wish to define a cubic curve such that the user specifies the position of
two endpoints and a midpoint, as well as the tangent at the midpoint. The
following figure illustrates some sample curves.

We'll
first construct the cubic curve for x(t). There are four constraints that are
to be met and four unknowns:

We
can solve for A using A = B_inv G_x. The final equation for x is thus:
x(t) = T B_inv G_x
The
matrix B_inv is often called the basis
matrix, which we shall denote by M.
We can thus write
x(t) = T M G_x
In
this case, we have
[ -4
0 -4 4 ]
M = [
8 -4 6 -4 ]
[ -5
4 -2 1 ]
[
1 0 0 0 ]
Lastly,
we can also write
x(t) = [ f1(t) f2(t) f3(t) f4(t) ] G_x
where
f1(t) ... f4(t) are the functions obtained from the product T M. These are
functions are called the blending
or basis functions,
because they serve to give a weighting to the various components of the
geometry vector, G. In this case, these are
f1(t)
= -4t^3 + 8t^2 - 5t + 1
f2(t)
= -4t^2 + 4t
f3(t)
= -4t^3 + 6t^2 - 2t
f4(t)
= 4t^3 - 4t^2 + 1,

where
f1(t) is the weighting function for P0, f2(t) is the weighting function for
P0.5, f3(t) is the weighting function for T0.5, and f4(t) is the weighting
function for P1. These basis functions look as follows:
The curves for y(t) and z(t) are contructed in an analogous fashion to that for x(t). The basis matrix and basis functions thus remain the same. Only the geometry vector changes. The geometry vector for y(t) gives the y components of P0, P0.5, T0.5, and P1. In general, we can write the curve as a single vector equation
The curves for y(t) and z(t) are contructed in an analogous fashion to that for x(t). The basis matrix and basis functions thus remain the same. Only the geometry vector changes. The geometry vector for y(t) gives the y components of P0, P0.5, T0.5, and P1. In general, we can write the curve as a single vector equation
P(t)
= T M G
which
encompasses the following three equations:
x(t)
= T M G_x
y(t)
= T M G_y
z(t)
= T M G_z
Hermite Curves
As
a second example, let's look at Hermite curves. Hermite curves are defined by two
points and two tangent vectors.

Let's
derive the equation for Hermite curves using the following geometry vector:
G_h
= [ P1 P4 R1 R4 ]^T
As
before, we'll express the curve as:
x(t)
= T A_h
= T M_h G_h
The
constraints we'll use to define the curve are:
x(0) = P1 = [ 0 0 0 1 ] A_h
x(1) = P4 = [ 1 1 1 1 ] A_h
x'(0)
= R1 = [ 0 0 1 0 ] A_h
x'(1)
= R4 = [ 3 2 1 0 ] A_h
Writing
these constraints in matrix form gives:
G_h
= B_h A_h
A_h
= inv(B_h) G_h
x(t)
= T A_h
= T inv(B_h) G_h
= T M_h
G_h
The
inverse of B_h is thus defined as the basis matrix for the hermite curve.
[
2 -2 1 1 ]
M_h
= [ -3 3 -2 -1 ]
[
0 0 1 0 ]
[
1 0 0 0 ]
As
before, the basis functions are the weighting factors for the terms in the geometry
vector, and are given by the product T M_h. Thus, for basis functions for
Hermite curves are
f1(t)
= 2t^3 - 3t^2 + 1
f2(t)
= -2t^3 + 3t^2
f3(t)
= t^3 - 2t^2 + t
f4(t)
= t^3 -
t^2
These
basis functions look as follows:
Bezier Curves
Bezier
curves are a variation of the Hermite curves. They are specified by four
points:

The
curve is closely related to the Hermite curve:
P1_h
= P1
P4_h
= P4
R1_h
= 3 (P2 - P1)
R4_h
= 3 (P4 - P3)
We'll
arrive at the basis matrix by expressing the above in matrix form:
[
P1_h ] [ 1 0 0
0 ] [ P1 ]
[
P4_h ] = [ 0 0 0 1 ] [ P2 ]
[
R1_h ] [ -3 3 0 0 ] [ P3 ]
[
R4_h ] [ 0 0 -3 3 ] [ P4 ]
P_h
= M_bh P_b
The
equation for a bezier curve can thus be written as:
P(t)
= T M_h M_bh P_b
P(t)
= T M_b P_b
where
[ -1
3 -3 1 ]
M_b
= [ 3 -6
3 0 ]
[ -3
3 0 0 ]
[
1 0 0 0 ]
The Bezier basis functions are as follows:
P(t)
= T M_b G_b
= f1(t) P1 + f2(t) P2 + f3(t) P3 + f4(t)
P4
where
f1(t) =
-t^3 + 3t^2 - 3t + 1
f2(t) =
3t^3 - 6t^2 + 3t
f3(t) = -3t^3 + 3t^2
f4(t) = t^3
or
alternatively,
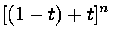
f1(t) = (1-t)^3
f2(t) = 3t (1-t)^2
f3(t) = 3t^2 (1-t)
f4(t) = t^3

Convex hull property
The
convex hull property ensures that the curve will never pass outside of the
convex hull formed by the four control vertices. As such, it lends a measure of
predictability to the curve. The Bezier basis functions satisfy the conditions
necessary for the convex hull property, namely:
0
<= fi(t) <= 1 for t in [0,1].
f1(t)
+ ... + fn(t) = 1
Bezier Curves of degree n
It
is not per chance that the basis functions for Bezier curves have the convex
hull property. How might one then go about designing a set of basis functions
that sum to one and ensure that each individual basis function remain in the
range [0,1]? The Bernstein
polynomials have exactly the required properties.

Using
the Bernsteinn polynomials, we can construct a Bezier curve of arbitrary
degree. For curves of higher degree than the cubic Bezier curve discussed thus
far, we'll need more than four control points. The general Bezier curve of
degree n is given by
The basis functions are equivalent to the terms arising from the expansion of
using the binomial expansion theorem. It is also obvious from this why the sum of all the terms is equal to one.
The basis functions are equivalent to the terms arising from the expansion of
using the binomial expansion theorem. It is also obvious from this why the sum of all the terms is equal to one.
Piecewise
Hermite and Bezier Curves
Hermite
curve segments can be connected in a continuous fashion by ensuring that the
end-point of one curve is the same as the starting point of another, as well as
ensuring that the tangent vectors for this point have the same direction.

In
terms of the above figure, this means P1'=P4,
R1'=k R4 . For a Bezier curve, the conditions are that the the last
two points of one curve and the first two points of the second curve are
aligned.
Geometric and Parametric Continuity
Geometric Continuity
G0: curves are joined
G1: first derivatives are proportional at
the join point
The curve tangents thus have the same direction, but not necessarily the same magnitude. i.e., C1'(1) = (a,b,c) and C2'(0) = (k*a, k*b, k*c).
The curve tangents thus have the same direction, but not necessarily the same magnitude. i.e., C1'(1) = (a,b,c) and C2'(0) = (k*a, k*b, k*c).
G2: first and second derivatives are
proportional at join point
Parametric Continuity
C0: curves are joined
C1: first derivatives equal
C2: first and second derivatives are
equal
If t is taken to be time, this implies that the acceleration is continuous.
If t is taken to be time, this implies that the acceleration is continuous.
Cn: nth derivatives are equal
As
their names imply, geometric continuity requires the geometry to be continuous,
while parametric continuity requires that the underlying parameterization be
continuous as well.
Parametric
continuity of order n implies geometric continuity of order n, but not
vice-versa.
b) B-Spline
curves or spline curve. Explain the role of blending function to plot a spline
curve [9]
a) Show
the nth degree B-spline basis function Bi,n (x) = 0 , if
x < t1 or x > ti+n-i. [6]
B-spline
curves share many important properties with Bézier curves, because the former
is a generalization of the later. Moreover, B-spline curves have more desired
properties than Bézier curves. The list below shows some of the most important
properties of B-spline curves.
In
the following we shall assume a B-spline curve C(u) of degree p is defined by n + 1 control
points and a knot vector U = { u0, u1,
...., um } with the first p+1 and last p+1
knots "clamped" (i.e., u0 = u1
= ... = up and um-p = um-p+1
= ... = um).
B-spline curve C(u) is a piecewise curve with
each component a curve of degree p.
As mentioned in previous page, C(u) can be viewed as the union of curve segments defined on each knot span. In the figure below, where n = 10, m = 14 and p = 3, the first four knots and last four knots are clamped and the 7 internal knots are uniformly spaced. There are eight knot spans, each of which corresponds to a curve segment. In the left figure below, these knot points are shown as triangles.
As mentioned in previous page, C(u) can be viewed as the union of curve segments defined on each knot span. In the figure below, where n = 10, m = 14 and p = 3, the first four knots and last four knots are clamped and the 7 internal knots are uniformly spaced. There are eight knot spans, each of which corresponds to a curve segment. In the left figure below, these knot points are shown as triangles.
This
nice property allows us to design complex shapes with lower degree polynomials.
For example, the right figure below shows a Bézier curve with the same set of
control points. It still cannot follow the control polyline nicely even though
its degree is 10!

In
general, the lower the degree, the closer a B-spline curve follows its control
polyline. The following figures all use the same control polyline and knots are
clamped and uniformly spaced. The first figure has degree 7, the middle one has
degree 5 and the right figure has degree 3. Therefore, as the degree decreases,
the generated B-spline curve moves closer to its control polyline.
Equality m = n + p + 1 must be
satisfied.
Since each control point needs a basis function and the number of basis functions satisfies m = n + p + 1.
Since each control point needs a basis function and the number of basis functions satisfies m = n + p + 1.
Clamped B-spline curve C(u) passes through
the two end control points P0 and Pn.
Note that basis function N0,p(u) is the coefficient of control point P0 and is non-zero on [u0,up+1). Since u0 = u1 = ... = up = 0 for a clamped B-spline curve, N0,0(u), N1,0(u), ...., Np-1,0(u) are zero and only Np,0(u) is non-zero (recall from the triangular computation scheme). Consequently, if u = 0, then N0,p(0) is 1 and C(0) = P0. A similar discussion can show C(1) = Pn
Note that basis function N0,p(u) is the coefficient of control point P0 and is non-zero on [u0,up+1). Since u0 = u1 = ... = up = 0 for a clamped B-spline curve, N0,0(u), N1,0(u), ...., Np-1,0(u) are zero and only Np,0(u) is non-zero (recall from the triangular computation scheme). Consequently, if u = 0, then N0,p(0) is 1 and C(0) = P0. A similar discussion can show C(1) = Pn
Strong
Convex Hull Property: A B-spline curve is contained in the convex hull of its
control polyline. More specifically, if u is in knot span [ui,ui+1),
then C(u) is in the convex hull of control points Pi-p,
Pi-p+1, ..., Pi.
If u is in knot span [ui, ui+1), there are only p+1 basis functions (i.e., Ni,p(u), ... , Ni-p+1,p(u), Ni-p,p(u)) non-zero on this knot span. Since Nk,p(u) is the coefficient of control point Pk, only p+1 control points Pi, Pi-1, Pi-2, .., Pi-p have non-zero coefficients. Since on this knot span the basis functions are non-zero and sum to 1, their "weighted" average, C(u), must lie in the convex hull defined by control points Pi, Pi-1, Pi-2, .., Pi-p. The meaning of "strong" is that while C(u) still lies in the convex hull defined by all control points, it lies in a much smaller one.
If u is in knot span [ui, ui+1), there are only p+1 basis functions (i.e., Ni,p(u), ... , Ni-p+1,p(u), Ni-p,p(u)) non-zero on this knot span. Since Nk,p(u) is the coefficient of control point Pk, only p+1 control points Pi, Pi-1, Pi-2, .., Pi-p have non-zero coefficients. Since on this knot span the basis functions are non-zero and sum to 1, their "weighted" average, C(u), must lie in the convex hull defined by control points Pi, Pi-1, Pi-2, .., Pi-p. The meaning of "strong" is that while C(u) still lies in the convex hull defined by all control points, it lies in a much smaller one.

The
above two B-spline curves have 11 control points (i.e., n = 10),
degree 3 (i.e., p=3) and 15 knots (m = 14) with first four
and last four knots clamped. Therefore, the number of knot spans is equal to
the number curve segments. The knot vector is
|
u0
|
u1
|
u2
|
u3
|
u4
|
u5
|
u6
|
u7
|
u8
|
u9
|
u10
|
u11
|
u12
|
u13
|
u14
|
|
0
|
0
|
0
|
0
|
0.12
|
0.25
|
0.37
|
0.5
|
0.62
|
0.75
|
0.87
|
1
|
1
|
1
|
1
|
The
left figure has u in knot span [u4, u5)
= [0.12,0.25) and the corresponding point (i.e. C(u)) in the second curve segment. Therefore, there are p+1
= 4 basis functions non-zero on this knot span (i.e., N4,3(u),
N3,3(u), N2,3(u) and N1,3(u)
) and the corresponding control points are P4, P3,
P2 and P1. The shaded area is the
convex hull defined by these four points. It is clear that C(u) lies in this convex hull.
The
B-spline curve in the right figure is defined the same way. However, u
is in [u9, u10) = [0.75,0.87) and the
non-zero basis functions are N9,3(u), N8,3(u),
N7,3(u) and N6,3(u). The
corresponding control points are P9,
P8, P7 and P6.
Consequently, as u moves from 0 to 1 and crosses a knot, a
basis functions becomes zero and a new non-zero basis function becomes
effective. As a result, one control point whose coefficient becomes zero will
leave the the definition of the current convex hull and is replaced with a new
control point whose coefficient becomes non-zero.
Local
Modification Scheme: changing the position of control point Pi
only affects the curve C(u) on interval [ui, ui+p+1).
This follows from another important property of B-spline basis functions. Recall that Ni,p(u) is non-zero on interval [ui, ui+p+1). If u is not in this interval, Ni,p(u)Pi has no effect in computing C(u) since Ni,p(u) is zero. On the other hand, if u is in the indicated interval, Ni,p(u) is non-zero. If Pi changes its position, Ni,p(u)Pi is changed and consequently C(u) is changed.
This follows from another important property of B-spline basis functions. Recall that Ni,p(u) is non-zero on interval [ui, ui+p+1). If u is not in this interval, Ni,p(u)Pi has no effect in computing C(u) since Ni,p(u) is zero. On the other hand, if u is in the indicated interval, Ni,p(u) is non-zero. If Pi changes its position, Ni,p(u)Pi is changed and consequently C(u) is changed.
The
above B-spline curves are defined with the same parameters as in the previous
convex hull example. We intent to move control point P2. The coefficient of this control point is N2,3(u)
and the interval on which this coefficient is non-zero is [u2,
u2+3+1) = [u2, u6) =
[0,0.37). Since u2 = u3 = 0, only three
segments that correspond to [u3, u4) (the
domain of the first curve segment), [u4, u5)
(the domain of the second curve segment) and [u5, u6)
(the domain of the third curve segment) will be affected. The right figure
shows the result of moving P2
to the lower right corner. As you can see, only the first, second and third
curve segments change their shapes and all remaining curve segments stay in
their original place without any change.
This
local modification scheme is very important to curve design, because we can
modify a curve locally without changing the shape in a global way. This will be
elaborated on the moeing control point page. Moreover, if
fine-tuning curve shape is required, one can insert more knots (and therefore
more control points) so that the affected area could be restricted to a very
narrow region. We shall talk about knot insertion later.
C(u) is Cp-k continuous at
a knot of multiplicity k
If u is not a knot, C(u) is in the middle of a curve segment of degree p and is therefore infinitely differentiable. If u is a knot in the non-zero domain of Ni,p(u), since the latter is only Cp-k continuous, so does C(u).
If u is not a knot, C(u) is in the middle of a curve segment of degree p and is therefore infinitely differentiable. If u is a knot in the non-zero domain of Ni,p(u), since the latter is only Cp-k continuous, so does C(u).
The
above B-spline curve has 18 control points (i.e., n = 17), degree
4, and the following clamped knot vector
|
u0 to u4
|
u5
|
u6 and u7
|
u8
|
u9 to u11
|
u12
|
u13 to u16
|
u17
|
u18 to u22
|
|
0
|
0.125
|
0.25
|
0.375
|
0.5
|
0.625
|
0.75
|
0.875
|
1
|
Thus,
u6 is a double knot, u9 is a triple knot
and u13 is a quadruple knot. Consequently, C(u) is of C4
continuous at any point that is not a knot, C3 continuous at
all simple knots, C2 continuous at u6, C1
continuous at u9, C0 continuous at u13.
All
points on the curve that correspond to knots are marked with little triangles.
Those corresponding to multiple knots are further marked with circles and their
multiplicities. It is very difficult to visualize the difference between C4,
C 3 and even C2 continuity. For the C1
case, the corresponding point lies on a leg, while the C0
case forces the curve to pass through a control point. We shall return to this
issue later when discussing modifying knots.
Variation
Diminishing Property:
The variation diminishing property also holds for B-spline curves. If the curve is in a plane (resp., space), this means no straight line (resp., plane) intersects a B-spline curve more times than it intersects the curve's control polyline.
The variation diminishing property also holds for B-spline curves. If the curve is in a plane (resp., space), this means no straight line (resp., plane) intersects a B-spline curve more times than it intersects the curve's control polyline.
In
the above figure, the blue line intersects both the control polyline and the
B-spline curve 6 times, while the yellow line also intersects the control
polyline and the B-spline curve 5 times. However, the orange line intersects
the control polyline 6 times and the curve 4 times.
Bézier Curves Are Special Cases of B-spline Curves.
If n = p (i.e., the degree of a B-spline curve is equal to n, the number of control points minus 1), and there are 2(p + 1) = 2(n + 1) knots with p + 1 of them clamped at each end, this B-spline curve reduces to a Bézier curve.
If n = p (i.e., the degree of a B-spline curve is equal to n, the number of control points minus 1), and there are 2(p + 1) = 2(n + 1) knots with p + 1 of them clamped at each end, this B-spline curve reduces to a Bézier curve.
Affine
Invariance
The affine invariance property also holds for B-spline curves. If an affine transformation is applied to a B-spline curve, the result can be constructed from the affine images of its control points. This is a nice property. When we want to apply a geometric or even affine transformation to a B-spline curve, this property states that we can apply the transformation to control points, which is quite easy, and once the transformed control points are obtained the transformed B-spline curve is the one defined by these new points. Therefore, we do not have to transform the curve.
The affine invariance property also holds for B-spline curves. If an affine transformation is applied to a B-spline curve, the result can be constructed from the affine images of its control points. This is a nice property. When we want to apply a geometric or even affine transformation to a B-spline curve, this property states that we can apply the transformation to control points, which is quite easy, and once the transformed control points are obtained the transformed B-spline curve is the one defined by these new points. Therefore, we do not have to transform the curve.
The Advantage of Using B-spline Curves
B-spline
curves require more information (i.e., the degree of the curve and a
knot vector) and a more complex theory than Bézier curves. But, it has more
advantages to offset this shortcoming. First, a B-spline curve can be a Bézier
curve. Second, B-spline curves satisfy all important properties that Bézier
curves have. Third, B-spline curves provide more control flexibility than
Bézier curves can do. For example, the degree of a B-spline curve is separated
from the number of control points. More precisely, we can use lower degree
curves and still maintain a large number of control points. We can change the
position of a control point without globally changing the shape of the whole
curve (local modification property). Since B-spline curves satisfy the strong
convex hull property, they have a finer shape control. Moreover, there are
other techniques for designing and editing the shape of a curve such as
changing knots.
However,
keep in mind that B-spline curves are still polynomial curves and polynomial
curves cannot represent many useful simple curves such as circles and ellipses.
Thus, a generalization of B-spline, NURBS, is required
a) How
is B-spline curve different from Bezier Curve?
[3]
A curve with complex shape may be represented by a composite
Bézier curve formed by joining a number of Bézier curves with some constraints
at the joints. The default constraint is that the curves are jointed smoothly.
This in turn requires the continuity of the first-order derivative at the
joint, which is known as the first-order parametric continuity. We may
relax the constraint to require only the continuity of the tangent directions
at the joint, which is known as the first-order geometric continuity.
Increasing the order of continuity usually improves the smoothness of a
composite Bézier curve. Although a composite Bézier curve may be used to
describe a complex shape in CAGD applications, there are primarily two
disadvantages associated the use of the composite Bézier curve:
It is considerably involved to join Bézier curves with some order
of derivatives continuity.
For the reason that will become clear later, a composite Bézier
curve requires more control vertices than a B-spline curve.
These disadvantages can be eliminated by working with spline
curves. Originally, a spline curve was a draughtsman's aid. It was a thin
elastic wooden or metal strip that was used to draw curves through certain
fixed points (called nodes). The resulting curve minimizes the internal strain
energy in the splines and hence is considered to be smooth. The mathematical
equivalent is the cubic polynomial spline. However, conventional polynomial
splines are not popular in CAD systems since they are not intuitive for
iterative shape design. B-splines (sometimes, interpreted as basis
splines) were investigated by a number of researchers in the 1940s. But
B-splines did not gain popularity in industry until de Boor and Cox published
their work in the early 1970s. Their recurrence formula to derive B-splines is
still the most useful tool for computer implementation.
It is beyond the scope of this section to discuss different ways
of deriving B-splines and their generic properties. Instead, we shall take you
directly to the definition of a B-spline curve and then explain to you the
mathematics of B-splines. Given M control vertices (or de Boor points) di (i = 0,1,�,M-1), a
B-spline curve of order k (or degree n = k-1) is defined as
|
where, Ni,k(u) are polynomials of degree n and known as
B-splines of order k. Analogous to Bézier curves, Ni,k(u) are
also called the B-spline basis functions. In most practical
applications, the B-spline basis functions are derived from the following knot
vector (or knot sequence):
|
where, ui are called knots. The reason to select
the first and last k knots to be equal is that the control vertices d0 and dM-1 are the points on the
curve. Furthermore, the tangent direction of the curve at d0 is from d0 to d1 and the tangent
direction at dM-1 is
from dM-2 to dM-1. Due to these
properties, the shape of a B-spline curve resembles the shape of its control
polygon formed by the control vertices di,
although such resemblance is not as intuitive as that of a Bézier curve. In the
literature, the M-k knots uk, uk+1, �, uM-1
are sometimes called the interior knots. If the interior knots are all
distinct, then the B-spline curve has M-k non-vanishing spans (i.e., the arc
length of each span is not zero).
As we said previously, there are several methods to derive the
B-spline basis functions Ni,k(u) in terms of the knot vector. We
present only the recursive formula derived by de Boor and Cox as follows:
|
with
|
These basis functions have the following properties:
The basis functions sum to 1, i.e., �i = 0M-1Ni,k(u)
= 1. This means that, similar to a Bézier curve, a B-spline curve lies also
within the convex hull.
Ni,k(u) > 0 for ui < u < ui+k
and, elsewhere, Ni,k(u) = 0. This is known as the local support
property of B-splines. In other words, a change of the control vertex di affects the B-spline
curve locally only for ui < u < ui+k.
If the interior knots are distinctive, Ni,k(u) has continuity
of order k-2. This implies that a B-spline curve has parametric continuity of
order k-2 across all the spans.
b) What
do you mean by rational B-spline? How is it more useful than non-rational
B-spline in drawing curves?
[5]
Rational
B-splines have all of the properties of non-rational B-splines plus the
following two useful features:
They
produce the correct results under projective transformations (while
non-rational B-splines only produce the correct results under affine transformations).
They
can be used to represent lines, conics, non-rational B-splines; and, when
generalised to patches, can represents planes, quadrics, and tori.
The
antonym of rational is non-rational. Non-rational B-splines are a
special case of rational B-splines, just as uniform B-splines are a special
case of non-uniform B-splines. Thus, non-uniform rational B-splines
encompass almost every other possible 3D shape definition. Non-uniform
rational B-spline is a bit of a mouthful and so it is generally abbreviated
to NURBS.
Rational
B-splines are defined simply by applying the B-spline equation (Equation 87) to homogeneous coordinates, rather
than normal 3D coordinates. We discussed homogeneous coordinates in the IB
course. You will remember that these are 4D coordinates where the
transformation from 4D to 3D is:
Last
year we said that the inverse transform was:
|
|
(95)
|
This
year we are going to be more cunning and say that:
|
|
(96)
|
Thus
our 3D control point,
,
becomes the homogeneous control point,
.
A
NURBS curve is thus defined as:
b) Explain the role of surface revolution.
[6]
A surface of
revolution is generated by revolving a given curve about an axis. The given
curve is a profile curve while the axis is the axis of
revolution..
To design a
surface of revolution, select Advanced Features followed by Cross Sectional
Design. This will bring up the curve system. In the curve system, just
design a profile curve based on the condition to be discussed below, and then
select Techniques followed by Generate Surface of Revolution. The
surface system will display a surface of revolution defined by the given
profile curve.
Some special
restrictions must be followed in order to design a surface of revolution under
the curve system. First, the axis of revolution must be the z-axis. Second, the profile
curve must be in the xz-plane. However, when brining up the curve
system, only the xy-plane is shown. To overcome this problem, one can
design a profile curve on the xy-plane and rotate the curve (not the
scene) about the x-axis 90 degree (or -90 degree, depending on your need).
In this way, the profile curve will be placed on the xz-plane. Note that
to modify control points after this rotation, you must use the sliders.
Many commonly
seen and useful surfaces are surfaces of revolution (e.g., spheres,
cylinders, cones and tori).
surface of
revolution
is a surface in Euclidean
space
created by rotating a curve (the generatrix) around a straight
line
in its plane (the axis)[1].Examples of surfaces generated by a straight line are cylindrical and conical surfaces when the line is coplanar with the axis, as well as hyperboloids of one sheet when the line is skew to the axis. A circle that is rotated about a diameter generates a sphere and if the circle is rotated about a coplanar axis other than the diameter it generates a torus.
c) Describe
the role of geometric curves in Font generation. [6]
The generation of scalable fonts in
the PostScript type one format requires the use of cubic B_ezier
curves in order to describe the
contours of a character. B_ezier curves were invented independently by de
Casteljau around 1959 and by
B_ezier around 1962 and are described in the books by Farin (1993) and
Su and Liu (1989).
Given the current point (x0; y0),
the PostScript command curveto takes the three points (x1; y1); (x2; y2); (x3;
y3)
as parameters. The four points are
called the B_ezier points. The B_ezier curve B(t) = (x(t); y(t)) can be
written as
x(t) = axt3 + bxt2 + cxt + x0
y(t) = ayt3 + byt2 + cyt + y0
where
ax =x3 3(x2
x1) x0 ay =y3 3(y2 y1) y0
bx =3(x2 2x1 + x0) by
=3(y2 2y1 + y0)
cx =3(x1 x0) cy =3(y1
y0) .
Equivalently,
x(t) = x3t3 + 3x2t2(1 t)
+ 3x1t(1 t)2 + x0(1 t)3
y(t) = y3t3 + 3y2t2(1 t)
+ 3y1t(1 t)2 + y0(1 t)3 ;
in the Bernstein polynomial format.
The monomial form of a B_ezier curve allows the computations to be
performed
with Horner's method. A B_ezier curve of the third degree takes one of four
possible shapes:
The junction point of the segments
is known as a knot or a breakpoint. A spline S, composed of
two adjacent B_ezier curves B0 and
B1 may be created as follows. Each curve has its own local parameter
t while S has a global parameter u,
where u 2 R. The knot sequence can be represented in terms of the
parameter u, knot i having
parameter value ui. The correspondence between t and u depends on the
actual length of each segment, t =
(u ui)=(ui+1 ui). We can think of B0 and B1 as two
independent
curves each having a local
parameter t ranging from 0 to 1 or we may regard it as two segments of
a composite curve with parameter u
in the domain [u0; u2]. _sthetically pleasing composite curves are
obtained by
introducing continuity restrictions and applying smoothness conditions to S
(Manning, 1974).
Roughly speaking, continuity of the
_rst and second order derivatives at knot points with respect to the
global parameter u is called C1 and
C2 continuity respectively.
To illustrate these notions of
smoothness, take two adjacent B_ezier sections B0 (with B_ezier points
b0; : : : ; b3) and B1 (with
B_ezier points b3; : : : ; b6). C1 continuity at b3, the knot, occurs if b2, b3
and b4 are
collinear, and if jjb4 b3jj=jjb3
b2jj = _1=_0, where _1 = u2 u1 and _0 = u1 u0.
Note that b1 and
b5 do not appear in the condition.
With C2 continuity, the points b1; b2; b3; b4; b5 inuence the second
derivative at the junction point.
If the curve S is C2 then there must a point d of a polygon b1; d; b5 that
describes the same global quadratic
polynomial as the _ve points mentioned above do. Hence assuming
that the curve is already C1, the
following equations must be satis_ed in order for d to exist:
b2 = (1 t1)b1 + t1d
b4 = (1 t1)d + t1b5 ;
where t1 =
_0=(u2 u0). The conditions for C1 and C2 curves are shown in the
following _gure.
a)Describe global illumination model. Define surface normal and
reflection vector. [9]
From Physics we can derive models, called
"illumination models", of how light reflects from surfaces and
produces what we perceive as color. In general, light leaves some light source,
e.g. a lamp or the sun, is reflected from many surfaces and then finally
reflected to our eyes, or through an image plane of a camera.
The contribution from the light that goes directly from
the light source and is reflected from the surface is called a "local
illumination model". So, for a local illumination model, the shading of
any surface is independent from the shading of all other surfaces.
A "global illumination model" adds to the local
model the light that is reflected from other surfaces to the current surface. A
global illumination model is more comprehensive, more physically correct, and
produces more realistic images. It is also more computationally expensive. We
will first look at some basic properties of light and color, the physics of
light-surface interactions, local illumination models, and global illumination
models.
Scan-line rendering methods use only local illumination
models, although they may use tricks to simulate global illumination.
The two major types of graphics systems that use global
illumination models are radiosity and ray tracing. These produce more
realistic images but are more computationally intensive than scan-line
rendering systems.
Light consists of photons which sometimes behave as particles and
sometimes as waves. This is known as the wave - particle duality and is true
for all particles (even baseballs).
l = c / u ; E = h * u ;
where l = wavelength of light, c = speed of light, u = the
frequency of light, E = the energy of the light, and h = Planck's constant.
There is a correlation between u (and thus E) and the "color" we
perceive.
Color and spectrum of
light
A light source has a particular energy spectrum, i.e., the energy
output is a function of the wavelength, rather than being constant. Below is a
plot of output energy versus wavelength for a perfect "white" light.
The intensity of light is proportional to the number of photons of
each wavelength. We could associate a spectrum for each light ray, i.e., look
at the spectral composition. But this would make it difficult to model
refraction since change in direction is a function of wavelength, so it is
easier to associate each light ray with a particular wavelength.
An infinite number of color spectra can give rise to the same perceived
"color". These are called metemers, i.e., they give perceptually
equivalent color but are spectrally different. This happens because our eyes do
not have receptors for all wavelengths but only certain ones. The eye contains
64% red cones, 32% green cones, and 4% blue cones
A surface has 4 types of interaction with light:
·
Diffuse reflection - light is reflected uniformly with no specific
direction
·
Specular reflection - light is reflected in a specific direction
·
Diffuse transmission - light is transmitted uniformly with no
preferred direction
·
Specular transmission - light is transmitted in a preferred
direction
A surface normal, or simply normal,
to a flat surface is a vector that is perpendicular to that surface. A normal
to a non-flat surface at a point P on the surface is
a vector perpendicular to the tangent plane to that surface at P.
The word "normal" is also used as an adjective: a line normal to a plane, the normal component of a
force, the normal vector, etc. The concept of normality generalizes to orthogonality.
·
In
the two-dimensional case, a normal line
perpendicularly intersects the tangent line to a curve at a given
point.
·
The
normal is often used in computer
graphics
to determine a surface's orientation toward a light source for flat
shading,
or the orientation of each of the corners (vertices) to mimic a curved surface
with Phong shading.
·
The operation of exchanging all points of a mathematical object
with their mirror images (i.e., reflections in a mirror). Objects that do not change handedness under reflection are said to be amphichiral; those that do are said to be chiral.
·
·
Consider the geometry of the left figure in which a point
is
reflected in a mirror (blue line). Then
|
|
(1)
|
·
so the reflection of
is given
by
|
|
(2)
|
·
·
The term reflection can also refer to the reflection of a ball,
ray of light, etc. off a flat surface. As shown in the right diagram
above, the reflection of a points
off a
wall with normal vector
satisfies
|
|
(3)
|
·
If the plane of reflection is taken as the
-plane, the reflection in two- or
three-dimensional space consists of making the
transformation
for each
point. Consider an arbitrary point
and a plane specified by the equation
|
|
(4)
|
·
This plane has normal vector
|
|
(5)
|
·
and the signed point-plane distance is
|
|
(6)
|
·
The position of the point reflected in the given plane is
therefore given by
|
|
|
|
(7)
|
|
|
|
|
(8)
|
·
The reflection of a point with trilinear coordinates
in a
point
is given
by
, where
|
|
|
|
(9)
|
|
|
|
|
(10)
|
|
|
|
|
(11)
|
a) Describe different
models used for illumination. How do you design surface normal vector. Explain
it’s importance. [6]
Calculating
a surface normal
For a convex polygon (such as a triangle), a surface normal
can be calculated as the vector cross product of two (non-parallel) edges of
the polygon.
For a plane given by the equation ax + by + cz + d = 0, the
vector (a,b,c) is a normal. For a plane given by the equation r = a + αb + βc,
where a is a vector to get onto the plane and b and c are non-parallel vectors
lying on the plane, the normal to the plane defined is given by b × c (the
cross product of the vectors lying on the plane).
For a hyperplane in n+1 dimensions, given by the equation r =
a0 + α1a1 + α2a2 + ... + αnan, where a0 is a vector to get onto the hyperplane
and ai for i = 1, ... , n are non-parallel vectors lying on the hyperplane, the
(unscaled) normal to the hyperplane can be approximated by (AAT + bbT) − 1b
where A = [a1, a2, ... , an] and b is an arbitrary vector in the space not in
the linear span of ai.
If a (possibly non-flat) surface S is parameterized by a
system of curvilinear coordinates x(s, t), with s and t real variables, then a
normal is given by the cross product of the partial derivatives
If a surface S is given implicitly as the set of points
(x,y,z) satisfying F(x,y,z) = 0, then, a normal at a point (x,y,z) on the
surface is given by the gradient
since the gradient at any point is
perpendicular to the level set, and F(x,y,z) = 0 (the surface) is a level set of
F.For a surface S given explicitly as a function f(x,y) of the independent
variables x,y (e.g., f(x,y) = a00 + a01y + a10x + a11xy), its normal can be
found in at least two equivalent ways. The first one is obtaining its implicit
form F(x,y,z) = z − f(x,y) = 0, from which the normal follows readily as the
gradient
(Notice that the implicit form could be defined
alternatively as F(x,y,z) = f(x,y) − z; these two forms correspond to the
interpretation of the surface being oriented upwards or downwards, respectively,
as a consequence of the difference in the sign of the partial derivative .) The second way of obtaining the normal
follows directly from the gradient of the explicit form, ; it is apparent from inspection that , where
is the upward unit vector.
If a surface does not have a tangent plane at a point, it
does not have a normal at that point either. For example, a cone does not have
a normal at its tip nor does it have a normal along the edge of its base.
However, the normal to the cone is defined almost everywhere. In general, it is
possible to define a normal almost everywhere for a surface that is Lipschitz
continuous.
• Surface
normals are essential in defining surface integrals of vector fields.
• Surface
normals are commonly used in 3D computer graphics for lighting calculations;
see Lambert's cosine law.
• Surface
normals are often adjusted in 3D computer graphics by normal mapping.
• Render
layers containing surface normal information may be used in Digital compositing
to change the apparent lighting of rendered elements.
d) How can we generate shadow-using ray
tracing algorithm? [4]
When a ray hits a surface, it could
generate up to three new types of rays: reflection, refraction, and shadow.[3] A reflected ray continues
on in the mirror-reflection direction from a shiny surface. It is then
intersected with objects in the scene; the closest object it intersects is what
will be seen in the reflection. Refraction rays traveling through transparent
material work similarly, with the addition that a refractive ray could be
entering or exiting a material. To further avoid tracing all rays in a scene, a
shadow ray is used to test if a surface is visible to a light. A ray hits a
surface at some point. If the surface at this point faces a light, a ray (to
the computer, a line segment) is traced between this intersection point and the
light. If any opaque object is found in between the surface and the light, the
surface is in shadow and so the light does not contribute to its shade. This
new layer of ray calculation added more realism to ray traced images.
a)Outline the
approach of the ray tracing and radiosity methods for rendering of scenes in
computer graphics, and then explain which technique you would use to display i)
an automobile and ii) the interior of a house, and why? [10]
Radiosity - Ray Tracing
The two most popular methods for calculating realistic
images are radiosity and ray tracing. The difference in the
simulation is the starting point: Ray tracing follows all rays from the eye of
the viewer back to the light sources. Radiosity simulates the diffuse
propagation of light starting at the light sources.
Ray Tracing
This
method is very good at simulating specular reflections and transparency, since
the rays that are traced through the scenes can be easily bounced at mirrors
and refracted by transparent objects.
The last scene with the black monitor contains some
diffuse reflection on the screen. This scene was very time consuming to
calculate, since ray tracing is not very well suited for calculating diffuse
reflections.
Radiosity
Calculating
the overall light propagation within a scene, for short global illumination
is a very difficult problem. With a standard ray tracing algorithm, this is a
very time consuming task, since a huge number of rays have to be shot. For this
reason, the radiosity method was invented. The main idea of the method is to
store illumination values on the surfaces of the objects, as the light is
propagated starting at the light sources.
Ray Casting
In ray casting the geometry which has been modeled
is parsed pixel by pixel, line by line, from the point of view outward, as if
casting rays out from the point of view. Where an object is intersected, the
color value at the point may be evaluated using several methods. In the
simplest, the color value of the object at the point of intersection becomes
the value of that pixel. The color may be determined from a texture-map. A more sophisticated
method is to modify the colour value by an illumination factor, but without
calculating the relationship to a simulated light source. To reduce artifacts,
a number of rays in slightly different directions may be averaged.
Rough simulations of optical properties may be
additionally employed: a simple calculation of the ray from the object to the
point of view is made. Another calculation is made of the angle of incidence of
light rays from the light source(s), and from these as well as the specified
intensities of the light sources, the value of the pixel is calculated. Another
simulation uses illumination plotted from a radiosity algorithm, or a
combination of these two.
Raycasting is primarily used for realtime simulations,
such as those used in 3D computer games and cartoon animations, where detail is
not important, or where it is more efficient to manually fake the details in
order to obtain better performance in the computational stage. This is usually
the case when a large number of frames need to be animated. The resulting
surfaces have a characteristic 'flat' appearance when no additional tricks are
used, as if objects in the scene were all painted with matte finish.
Ray tracing
Ray tracing aims to simulate the
natural flow of light, interpreted as particles. Often, ray tracing methods are
utilized to approximate the solution to the rendering
equation
by applying Monte
Carlo methods
to it. Some of the most used methods are Path Tracing, Bidirectional Path
Tracing,
or Metropolis
light transport,
but also semi realistic methods are in use, like Whitted Style Ray Tracing, or hybrids. While most
implementations let light propagate on straight lines, applications exist to
simulate relativistic spacetime effects[1].
In a final, production quality rendering of a ray traced
work, multiple rays are generally shot for each pixel, and traced not just to
the first object of intersection, but rather, through a number of sequential
'bounces', using the known laws of optics such as "angle of incidence
equals angle of reflection" and more advanced laws that deal with refraction
and surface roughness.
Once the ray either encounters a light source, or more
probably once a set limiting number of bounces has been evaluated, then the
surface illumination at that final point is evaluated using techniques
described above, and the changes along the way through the various bounces
evaluated to estimate a value observed at the point of view. This is all
repeated for each sample, for each pixel.
In distribution
ray tracing,
at each point of intersection, multiple rays may be spawned. In path
tracing,
however, only a single ray or none is fired at each intersection, utilizing the
statistical nature of Monte Carlo experiments.
As a brute-force method, ray tracing has been too slow to
consider for real-time, and until recently too slow even to consider for short
films of any degree of quality, although it has been used for special effects
sequences, and in advertising, where a short portion of high quality (perhaps
even photorealistic) footage is required.
However, efforts at optimizing to reduce the number of
calculations needed in portions of a work where detail is not high or does not
depend on ray tracing features have led to a realistic possibility of wider use
of ray tracing. There is now some hardware accelerated ray tracing equipment,
at least in prototype phase, and some game demos which show use of real-time
software or hardware ray tracing.
Radiosity
Radiosity is a method which attempts to
simulate the way in which directly illuminated surfaces act as indirect light
sources that illuminate other surfaces. This produces more realistic shading
and seems to better capture the 'ambience' of an indoor scene. A
classic example is the way that shadows 'hug' the corners of rooms.
The optical basis of the simulation is that some diffused
light from a given point on a given surface is reflected in a large spectrum of
directions and illuminates the area around it.
The simulation technique may vary in complexity. Many
renderings have a very rough estimate of radiosity, simply illuminating an
entire scene very slightly with a factor known as ambiance. However, when
advanced radiosity estimation is coupled with a high quality ray tracing
algorithim, images may exhibit convincing realism, particularly for indoor
scenes.
In advanced radiosity simulation, recursive,
finite-element algorithms 'bounce' light back and forth between surfaces in the
model, until some recursion limit is reached. The colouring of one surface in
this way influences the colouring of a neighbouring surface, and vice versa.
The resulting values of illumination throughout the model (sometimes including
for empty spaces) are stored and used as additional inputs when performing
calculations in a ray-casting or ray-tracing model.
Due to the iterative/recursive nature of the technique,
complex objects are particularly slow to emulate. Prior to the standardization
of rapid radiosity calculation, some graphic artists used a technique referred
to loosely as false radiosity by darkening areas of
texture maps corresponding to corners, joints and recesses, and applying them
via self-illumination or diffuse mapping for scanline rendering. Even now,
advanced radiosity calculations may be reserved for calculating the ambiance of
the room, from the light reflecting off walls, floor and ceiling, without
examining the contribution that complex objects make to the radiosity—or
complex objects may be replaced in the radiosity calculation with simpler
objects of similar size and texture.
Radiosity calculations are viewpoint independent which
increases the computations involved, but makes them useful for all viewpoints.
If there is little rearrangement of radiosity objects in the scene, the same
radiosity data may be reused for a number of frames, making radiosity an
effective way to improve on the flatness of ray casting, without seriously
impacting the overall rendering time-per-frame.
Because of this, radiosity is a prime component of
leading real-time rendering methods, and has been used from beginning-to-end to
create a large number of well-known recent feature-length animated 3D-cartoon
films.
4. a) Describe the Phong illumination model. [8]
Phong Shading Model for Scan-Line
Graphics
The third shading model, Phong shading, is similar to
Gouraud shading except that the Normals are interpolated. Phong shading is more realistic than Gouraud shading, but requires more
computation. It does not produce shadows or reflections. The surface normals at
the triangle's points are used to compute a surface normal for each pixel,
which in turn creates a more accurate RGB value for each pixel .Thus, the
specular highlights are computed much more precisely than in the Gouraud
shading model.
The algorithm is as follows:
1.
Compute a normal N for each vertex of the polygon.
2.
From bi-linear interpolation compute a normal, Ni for each pixel.
(This must be renormalized each time)
3.
From Ni compute an intensity Ii for each pixel of the polygon.
4.
Paint pixel to shade corresponding to Ii.
Note that this method is much more computationally
intensive than Gouraud shading:
Gouraud: 3 floating point adds per pixel (3 intensities).
Phong: 3 fp adds (normal) + (3 squares + sqrt for normal)
+ (recompute intensity - 3 * (about 10-20 fp multiplies depending on degree of
approximation).
So may do Phong shading only when want good specular
highlights
Phong shading is done by interpolating the vertex normals across the surface of a polygon, or triangle, and illuminating
the pixel at each point, usually using the phong lighting model. At each pixel,
you need to re-normalize the
normal vector, and also
calculate the reflection vector.
The reflection vector is calculated by:
R = 2.0*(N.L)*N - L
We feed these vectors into the
illumination equation for the
phong lighting model, which is
I = Ia*ka*Oda + fatt*Ip[kd*Od(N.L) +
ks(R.V)^n]
Here, the variables are:
Ia is the ambient intensity
ka is the ambient co-efficient
Oda is the colour for the
ambient
fatt is the atmospheric attenuation factor, ie depth shading
Ip is the intensity of the
point light source
kd is the diffuse co-efficient
Od is the objects colour
ks is the specular co-efficient
n is the objects shinyness
N is the normal vector
L is the lighting vector
R is the reflection vector
V is the viewing vector
To do multiple light sources, you
sum the term fatt*Ip[kd*Od(N.L) + ks(R.V)^n] for each light source. Also, you need to repeat this equation for
each colour band you are interested in.
Such shading is incredibly expensive, and
cannot be done in realtime
on common hardware. So, people
have been looking into optimizations and
approximations of this for a long time.
OPTIMIZING THE PHONG SHADING MODEL
Lets mathematically break down the phong shading model. After all is said and done, you are left with the dot product of the pixel normal vector and the light vector divided by the product of the magnitudes of these two vectors. Another way to express this value is (cos é), where é is the smallest angle between the two vectors.
u = pixel normal vector
v = light vector
u dot v = cos é * |u| * |v|
u dot v
cos é = ---------
|u| * |v|
So the dot product of a normal vector and a light vector divided by the product of the magnitudes of the two vectors is equal to the cosine of the smallest angle between the two vectors. This should be nothing new, it is the same technique used to find color values in the lambert and gouraud shading techniques. Lets attempt to graphically represent what is going on with phong, gouraud and
lambert shading.
graph of y = cos é (*)
|
|
|* *
| *
| *
| *
| *
| *
| *
| *
y | *
| *
| *
| *
| *
| *
| *
| *
| *
| *
+------------------------------------------
é
The phong shading model states that the intensity of light at a given point is given by the dot product of the light and normal vectors divided by the product of the magnitudes of the two vectors. Flat shading is the roughest approximation of this, planes are rendered in a single color which is determined by the cosine of the angle between the plane's normal vector and the light vector. If we graph the intensity of light striking flat shaded planes, we should find that they roughly form a cosine curve, since the color values at certain points are determined by the cosine of the angle
between two vectors
graph of Intensity = cos é (*)
| flat shading approximations of light intensity shown as (X)
|
|*XXXX*XX dé (angle between normal vectors)
| * -------------
| XXXXX*XXXX |
| * | dI (change in intensity)
| * |
| XXX*XXXXXX |
| *
I | *
| *
| *XXXXXX
| *
| *
| *
| *
| *
| *XXXXX
| *
| *
+------------------------------------------
é
This graph tells us something that we already know by practical experience, that flat shading is very inaccurate for large values of dé, and much more accurate for small values of dé. This means that the shading appears smoother when the angle between normals (and therefore between planes) is very small.
Now lets consider gouraud shading. Gouraud shading is a linear interpolation of color between known intensities of light. The known intensities in gouraud shading are defined at each
vertex, once again by use of the dot product. In this case, the normal vector at each polygon vertex is the average of the normal vectors (the ones used in flat shading) for all planes which share
that vertex. Normals of planes which are greater than 90 and less than 270 degrees from the plane containing the vertex in question are not considered in the average because the two planes are facing away from each other. If we plot interpolated intensities used in gouraud shading against the cosine curve, it is evident that gouraud shading is a much more accurate approximation than flat shading.
graph of Intensity = cos é (*)
| interpolated light intensities shown as (X)
| ---------------------------------+
|*X * | in this region, the linear
| XXXX ---*--------+ | approximation is always going to
| XXX * | dI (error) | be inaccurate without a very
| XXXX --*--+ | small value for dé
| XXX * |
| XXXXX* --------------+
||____________________|X* |
I | dé X* |
| X* | in this region, a gouraud
| X* | approximation is nearly
| X* | perfect because cos x is
| X* | nearly linear
| X* |
| X* |
| X* |
| X* |
| X* |
| X* |
+------------------------------------------
é
This graph tells us that gouraud shading is very accurate as é->90. However, if é is small and dé is large, gouraud shading will look like an obvious linear approximation. This can be avoided
by using smaller values of dé (i.e. use more polygons to fill in the gaps in the interpolation). With enough polygons, gouraud shading can be 100% correct.
Phong shading is the most correct method of shading because it is not an approximation, distinct colors are determined for each pixel. These values follow the cosine curve exactly, because the intensity of each pixel was calculated using a dot product, which eventually yields the cosine of the angle between the plane at that pixel and the light vector. If we plot phong shading intensities with the cosine curve, we find that the values follow the function exactly.
graph of Intensity = cos é (*)
| phong light intensities shown as (X)
|
|X X
| X
| X
| X
| X
| X
| X
| X
I | X
| X
| X
| X
| X
| X
| X
| X
| X
| X
+------------------------------------------
é
Once again, shadings calculated using the phong model follow the cosine curve, because the dot product between the normal vector at each pixel and the light vector can be simplified to a function involving cos é.
c) Gourand Shading [9]
Gouraud shading model.
The second shading model, Gouraud shading, computes an
intensity for each vertex and then interpolates the computed intensities across
the polygons. Gouraud shading performs a bi-linear interpolation of the
intensities down and then across scan lines. It thus eliminates the sharp
changes at polygon boundaries
The algorithm is as follows:
1.
Compute a normal N for each vertex of the polygon.
2.
From N compute an intensity I for each vertex of the polygon.
3.
From bi-linear interpolation compute an intensity Ii for each
pixel.
4.
Paint pixel to shade corresponding to Ii.
|
How do we compute N for a vertex? Let N = the average of the
normals of the polygons which include the vertex. Note that 4 sided polygons
have 4 neighbors and triangles have 6 neighbors.
|
|
|
We can find the neighbors for a particular vertex by searching
the polygons and including any polygons which include the vertex. Now look at
performing the bi-linear intensity interpolation. This is the same as the
bi-linear interpolation for the z depth of a pixel (used with the z buffer
visible surface algorithm).
|
|
Advantages of Gouraud shading:
Gouraud shading gives a much better image than faceted
shading (the facets no longer visible). It is not too computationally
expensive: one floating point addition (for each color) for each pixel. (the
mapping to actual display registers requires a floating point multiplication)
Disadvantages to Gouraud shading:
It eliminates creases that you may want to preserve, e.g.
in a cube. We can modify data structure to prevent this by storing each
physical vertex 3 times, i.e. a different logical vertex for each polygon.
Gouraud Shading and Specular
Highlights
Gouraud shading does not handle specular highlights very
well. Look at the following case of a light source in three different positions
relative to a polygon.
If the Phong number is high (corresponding to a small
viewing cone and thus a small specular highlight), then the highlight should
move across the surface of the polygon as the light is shifted. But since the
intensities are only computed at the vertices, the highlight will appear in
Case 1, disappear in Case 2, and reappear in Case 3. Also, the highlight will
be smeared out in both Cases 1 and 3 since the interpolation of the intensities
will cause it to decrease slower than it really should.
f) Explain, why Phong shading is more
computationally demanding than Gouraud Shading and achieves better results, in
particular for specular reflection? [4]
Phong shading is more
realistic than Gouraud shading, but requires more computation. It does not
produce shadows or reflections. The surface normals at the triangle's points
are used to compute a surface normal for each pixel, which in turn creates a
more accurate RGB value for each pixel .Thus, the specular highlights are
computed much more precisely than in the Gouraud shading model.
e) Explain the ray tracing
and describe the procedure to determine the intersection of an arbitrary ray
with YZ plane. [4]
Ray-Tracing for planes
• The plane equation: n.R + D = 0
~ Where n is the normal vector and R=
• We calculate the intersection of a ray with a plane by using R(t),
from the ray equation in the plane eq.: n.R(t) + D = 0
• We get:
which
allows us to find the intersection point.
b) Explain ray tracing and
compare it with ray casting. Describe the intersection of an arbitrary ray with
yz plane. [6]
Ray-casting is a technique that
transform a limited form of data (a very simplified map or floor plan)
into a 3D projection by tracing rays from the view point into the viewing
volume
|
Like ray-casting,
ray-tracing "determines the visibility of surfaces by tracing imaginary
rays of light from viewer's eye to the object in the scene" (Foley 701).
From both definitions, it
seems that ray-casting and ray-tracing is the same. Indeed, some books use
both terms interchangeably. From game programmers perspective, however,
ray-casting is regarded as a special implementation (subclass) of
ray-tracing.
This distinctions because
is made because in general, ray-casting is faster than ray-tracing. This is
possible because ray-casting utilizes some geometric constraint to speed up
the rendering process. For instance: walls are always perpendicular with
floors (you can see this in games such as Doom or Wolfenstein 3D). If it were
not for such constraints, ray-casting will not be feasible. We would not want
to ray-cast arbitrary splines for instance, because it is difficult to find a
geometrical constraints on such shapes.
Table
1 is a general comparison between
ray-casting and ray-tracing. The main point to remember is that there are
"less number of rays" to trace in ray-casting because of some
"geometric constraints." Or, it can also be said that ray-casting
is a special purpose implementation of ray-tracing.
|
|
Bidvertiser
|
TABLE 1: A COMPARISON BETWEEN RAY-CASTING AND RAY-TRACING
(GAME PROGRAMMERS/GAME DEVELOPERS PERSPECTIVE)
(GAME PROGRAMMERS/GAME DEVELOPERS PERSPECTIVE)
a) Design an algorithm for hidden-surface
elimination using ray-tracing. [10]
Raytracing algorithm
Raytracing is, in many ways, a standardized technique.
Almost all raytracing programs (known as "raytracers") use the same
basic algorithm in one way or the other. This algorithm is presented below.
·
The Pre-Rendering Section
·
The Main Rendering Loop
·
The Post-Rendering Section
The Pre-Rendering Section
This section is executed
before the actual rendering of the scene takes place. It is the most
implementation and programmer dependent of all the sections of the algorithm.
Its structure and content relies entirely on how the programmer has chosen to
describe and store his scene and what variables need to be initialized for the
program to run properly. Some parts that are usually present in some form or
the other include generation of efficiency structures, initialization of the
output device, setting up various global variables etc. No standard algorithm
exists for this section.
The Main Rendering Loop
This section actually
produces the picture of the 3-D scene. The algorithm for this section is given
below. Note that the procedure RayTrace is recursive, that is, it calls itself.
Procedure RenderPicture()
For each pixel on the screen,
Generate a ray R from the viewing position through the point on the view
plane corresponding to this pixel.
Call the procedure RayTrace() with the arguments R and 0
Plot the pixel in the colour value returned by RayTrace()
Next pixel
End Procedure
Procedure RayTrace(ray R, integer Depth) returns colour
Set the numerical variable Dis to a maximum value
Set the object pointer Obj to null
For each object in the scene
Calculate the distance (from the starting point of R) of the nearest
intersection of R with the object in the forward direction
If this distance is less than Dis
Update Dis to this distance
Set Obj to point to this object
End if
Next object
If Obj is not null
Set the position variable Pt to the nearest intersection point of R and Obj
Set the total colour C to black
For each light source in the scene
For each object in the scene
If this object blocks the light coming from the light source to Pt
Attenuate the intensity of the received light by the transmittivity
of the object
End if
Next object
Calculate the perceived colour of Obj at Pt due to this light source
using the value of the attenuated light intensity
Add this colour value to C
Next light source
If Depth is less than a maximum value
Generate two rays Refl and Refr in the reflected and refracted directions,
starting from Pt
Call RayTrace with arguments Refl and Depth + 1
Add (the return value * reflectivity of Obj) to C
Call RayTrace with arguments Refr and Depth + 1
Add (the return value * transmittivity of Obj) to C
End if
Else
Set the total colour C to the background colour
End if
Return C
End Procedure
The Post-Rendering Section
This section is also more
or less programmer dependent, but the functions performed usually fall into one
or more of the following groups
·
Memory
cleanup: The space taken up for the scene and rendering data is released.
·
Applying
post-process filters: Special effects such as blur, edge highlighting,
suppression of colour channels, gamma correction etc may be added to the
picture after the actual rendering has taken place. Antialiasing, motion blur
etc are usually a part of the main rendering section.
·
Freeing
output devices: If the output device is a file, it is closed. If it is a
hardware device, then any link established with it may be suspended.
·
Displaying
statistics and other user data: This is, of course, entirely up to the
programmer. But it is useful to know the details of the rendering process.
a) Suggest a scheme for modeling
transparency and refraction in a scene assuming existence of point light
source. [10]
Ray Tracing
·
For
each pixel, compute the colour that the viewer's eye will see in the scene
·
hidden
surface removal is a product of this
·
ray
tracing is also effective for photorealistic rendering
Ray Tracing
·
ray
tracers need to compute intersection of eye ray with every object, and save the
closest object point found
o
recall:
ray is a direction in 3D space
o
require
various mathematical formulae to compute intersection of ray with planes,
spheres, ellipsoids, cylinders, other surfaces and volumes
·
contrast
ray tracing with pure Z buffering
o
ray
tracing: 1024 by 1024 screen, 100 objects --> 100 Million intersections to
compute
o
Z
buffering: saves nearest z value of objects that project to that pixel
§
-->
no intersections, and only visible pixels used
·
Ray
tracing still useful for its ability to calculate lighting & effects, which
would have to be done in Z buffering application anyway
·
Can
speed up ray tracing by exploiting coherence properties:
o
optimizing
intersection calculations, by computing equation values in advance and saving
them; exploiting special properties of some geometries;
o
avoiding
intersection computations (object extent checks)
o
exploiting
spatial partitioning
b) Intersection of the ray from the
viewpoint to the object is first checked for its intersection with the extent
of the object. Suggest an efficient algorithm for this task. [9]
a) Compute the
illumination of specular model for following:
n =j , L=
-I +2j –k , S= I +3/2 j + 1/2 k [6]
e) Describe how hidden surface removal and
projection are integrated into the ray-tracing process? [4]
5.
b) The (implicit) canonical equation for an
elliptic paraboloid is x2 + y2- z = 0. Determine if a ray
represented by the parametric vector s + td (where vector s specifies its
starting point and d describes its direction) intersects the paraboloid. [10]
a) Explain briefly the OpenGL Utility
Toolkit (GLUT). [6]
GLUT
(pronounced like the glut in gluttony) is the OpenGL Utility Toolkit, a window
system independent toolkit for writing OpenGL programs. It implements a simple
windowing application programming interface (API) for OpenGL. GLUT makes it
considerably easier to learn about and explore OpenGL programming. GLUT
provides a portable API so you can write a single OpenGL program that works
across all PC and workstation OS platforms.
GLUT
is designed for constructing small to medium sized OpenGL programs. While GLUT
is well-suited to learning OpenGL and developing simple OpenGL applications,
GLUT is not a full-featured toolkit so large applications requiring
sophisticated user interfaces are better off using native window system
toolkits. GLUT is simple, easy, and small.
The
toolkit supports:
·
Multiple
windows for OpenGL rendering
·
Callback
driven event processing
·
Sophisticated
input devices
·
An
'idle' routine and timers
·
A
simple, cascading pop-up menu facility
·
Utility
routines to generate various solid and wire frame objects
·
Support
for bitmap and stroke fonts
·
Miscellaneous
window management functions
c) Explain
RGBA mode of OpenGL. [6]
OpenGL has two color modes — the RGBA mode and color index mode. In RGBA
mode, a color is specified by three intensities (for the Red, Green, and Blue
components of the color) and optionally a fourth value, Alpha, which controls
transparency.
The function glColor4f(red, green, blue, alpha) maps available red,
green, and blue intensities onto (0.0, 1.0) where 0.0 means that the color
component is absent ((0.0, 0.0, 0.0) is black) and 1.0 is a saturated color
((1.0, 1.0, 1.0) is white.)
The number of bits used to represent each color depends upon the
graphics card. Current graphics cards have several Mbytes of memory, and use 24
or 32 bits for color (24-bit: 8 bits per color; 32-bit: 8 bits per color + 8
bits padding or transparency). The term bitplane refers to an image of
single-bit values. Thus, a system with 24 bits of color has 24 bitplanes. Not
long ago, 8 to 16 bits of color was usual, permitting only 256 to 64K
individual colors. In order to increase the range of colors displayed, a color lookup table was
often used. In the table, colors would be represented by, m−bit entries (e.g.m
= 24). The length of this table was 2n, with colors selected1by an n-bit index.
For a system with 8 bitplanes, 28 = 256 different colors
could be displayed simultaneously. These 256 colors could be selected from a
set of 2m colors. For m = 24 this gives 224 _ 16 million colours. The color
table could be altered to give different palettes of colors.
OpenGL supports this mode, called color index mode.The command glIndexf(cindex) sets the
current color index
to cindex.
Analogous to glClearColor() there is a corresponding
glClearIndex(clearindex) which sets the clearing color to
clearindex.2 OpenGL has no function to set a color lookup
table, but GLUT has the function glutSetColor(GLint index, GLfloat red, GLfloat
green, GLfloat blue) which sets the color at index to the intensities specified
by red, green, and blue.
The function glGetIntegerv() with arguments GL_RED_BITS,
GL_GREEN_BITS, GL_BLUE_BITS, GL_ALPHA_BITS, and
GL_INDEX_BITS allows you to determine the number of bits
for the identified entity.
Color-index mode does not support transparency.
Choosing between color modes
In general, RGBA mode provides more flexibility, and is
fully supported by current hardware.
Color index mode may be useful when:
• porting or modifying an existing program using
color-index mode
• only a small number of bitplanes are available (e.g., 8
bits — possibly 3 for red, 3 for green, and 2 for blue, giving a
very small range for each color)
• drawing layers or color-map animation are used.
Shading models
OpenGL has two shading models; primitives are drawn with a
single color (flat shading) or with a smooth color variation
from vertex to vertex (smooth shading, or Gouraud shading)
The shading mode is specified with glShadeModel(mode) where mode is either
GL_SMOOTH or GL_FLAT.
In RGBA mode, the color variation is obtained by
interpolating the RGB values. The interpolation is on each of the R, G, and B
components, and is in the horizontal and vertical directions. In color index
mode, the index values are interpolated, so the color table must be loaded with
a set of smoothly changing colors.
For flat shading, the color of a single vertex determines
the color of the polygon. For the situation where lighting elements are
present, a more elaborate shading algorithm can be used.
b) Explain the procedure of
rendering the pipelines. [6]
In 3D graphics rendering, the stages required to transform a
three-dimensional image into a two-dimensional screen. The stages are
responsible for processing information initially provided just as properties at
the end points (vertices) or control points of the geometric primitives used to
describe what is to be rendered. The typical primitives in 3D graphics are
lines and triangles. The type of properties provided per vertex include x-y-z
coordinates, RGB values, translucency, texture, reflectivity and other
characteristics.
An Assembly Line
Graphics rendering is like a manufacturing assembly line with each stage adding something to the previous one. Within a graphics processor, all stages are working in parallel. Because of this pipeline architecture, today's graphics processing units (GPUs) perform billions of geometry calculations per second. They are increasingly designed with more memory and more stages, so that more data can be worked on at the same time.
The Goal
For gamers, photorealistic rendering at full speed is the goal, and human skin and facial expressions are the most difficult. Although there are always faster adapters on the market with more memory and advanced circuitry that render 3D action more realistically, thus far, no game has fooled anyone into believing a real person is on screen, except perhaps for a few seconds.
Bus interface/Front End
Interface to the system to send and receive data and commands.
Vertex Processing
Converts each vertex into a 2D screen position, and lighting may be applied to determine its color. A programmable vertex shader enables the application to perform custom transformations for effects such as warping or deformations of a shape.
Clipping
This removes the parts of the image that are not visible in the 2D screen view such as the backsides of objects or areas that the application or window system covers
|
|
|
The Pipeline
|
These are the various stages in the typical pipeline of a modern
graphics processing unit (GPU). (Illustration courtesy of NVIDIA Corporation.)
Primitive Assembly, Triangle Setup
Vertices are collected and converted into triangles. Information is generated that will allow later stages to accurately generate the attributes of every pixel associated with the triangle.
Rasterization
The triangles are filled with pixels known as "fragments," which may or may not wind up in the frame buffer if there is no change to that pixel or if it winds up being hidden.
Occlusion Culling
Removes pixels that are hidden (occluded) by other objects in the scene.
Parameter Interpolation
The values for each pixel that were rasterized are computed, based on color, fog, texture, etc.
Pixel Shader
This stage adds textures and final colors to the fragments. Also called a "fragment shader," a programmable pixel shader enables the application to combine a pixel's attributes, such as color, depth and position on screen, with textures in a user-defined way to generate custom shading effects.
Pixel Engines
Mathematically combine the final fragment color, its coverage and degree of transparency with the existing data stored at the associated 2D location in the frame buffer to produce the final color for the pixel to be stored at that location. Output is a depth (Z) value for the pixel.
Frame Buffer Controller
The frame buffer controller interfaces to the physical memory used to hold the actual pixel values displayed on screen. The frame buffer memory is also often used to store graphics commands, textures as well as other attributes associated with each pixel.
c) Explain the following statement:
void
glPolygonMode(GLenum face, GLenum mode);
void glFrontFace(GLenum
mode);
[4]
glPolygonMode
— select a polygon rasterization mode
C
Specification
void glPolygonMode( GLenum face,
GLenum mode);
Parameters
face
Specifies the polygons that mode
applies to. Must be GL_FRONT for front-facing polygons, GL_BACK for back-facing
polygons, or GL_FRONT_AND_BACK for front- and back-facing polygons.
mode
Specifies how polygons will be
rasterized. Accepted values are GL_POINT, GL_LINE, and GL_FILL. The initial
value is GL_FILL for both front- and back-facing polygons.
The glFrontFace
function defines front-facing and back-facing polygons.
void WINAPI
glFrontFace( GLenum mode);
mode
The orientation of front-facing polygons. GL_CW and
GL_CCW are accepted. The default value is GL_CCW.
Return
Value
This function does not return a value.
c) Describe rendering pipeline in OpenGL.
[10]
OpenGL Pipeline has a series of processing stages in
order. Two graphical information, vertex-based data and pixel-based data, are
processed through the pipeline, combined together then written into the frame buffer.
Notice that OpenGL can send the processed data back to your application. (See
the grey colour lines)
OpenGL Pipeline
Display
List
Display list is a group of OpenGL commands that have been
stored (compiled) for later execution. All data, geometry (vertex) and pixel
data, can be stored in a display list. It may improve performance since
commands and data are cached in a display list. When OpenGL program runs on the
network, you can reduce data transmission over the network by using display
list. Since display lists are part of server state and reside on the server
machine, the client machine needs to send commands and data only once to
server's display list. (See more details in Display List.)
Vertex
Operation
Each vertex and normal coordinates are transformed by
GL_MODELVIEW matrix (from object coordinates to eye coordinates). Also, if
lighting is enabled, the lighting calculation per vertex is performed using the
transformed vertex and normal data. This lighting calculation updates new color
of the vertex. (See more details in Transformation)
Primitive
Assembly
After vertex operation, the primitives (point, line, and
polygon) are transformed once again by projection matrix then clipped by
viewing volume clipping planes; from eye coordinates to clip coordinates. After
that, perspective division by w occurs and viewport transform is applied in
order to map 3D scene to window space coordinates. Last thing to do in
Primitive Assembly is culling test if culling is enabled.
Pixel
Transfer Operation
After the pixels from client's memory are unpacked(read),
the data are performed scaling, bias, mapping and clamping. These operations
are called Pixel Transfer Operation. The transferred data are either stored in
texture memory or rasterized directly to fragments.
Texture
Memory
Texture images are loaded into texture memory to be
applied onto geometric objects.
Raterization
Rasterization is the conversion of both geometric and
pixel data into fragment. Fragments are a rectangular array containing color,
depth, line width, point size and antialiasing calculations (GL_POINT_SMOOTH,
GL_LINE_SMOOTH, GL_POLYGON_SMOOTH). If shading mode is GL_FILL, then the
interior pixels (area) of polygon will be filled at this stage. Each fragment
corresponds to a pixel in the frame buffer.
Fragment
Operation
It is the last process to convert fragments to pixels
onto frame buffer. The first process in this stage is texel generation; A
texture element is generated from texture memory and it is applied to the each
fragment. Then fog calculations are applied. After that, there are several
fragment tests follow in order; Scissor Test ⇒
Alpha Test ⇒ Stencil Test ⇒ Depth Test.
Finally, blending, dithering, logical operation and masking by bitmask are performed and actual pixel data are stored in frame buffer.
Finally, blending, dithering, logical operation and masking by bitmask are performed and actual pixel data are stored in frame buffer.
Feedback
OpenGL can return most of current states and information
through glGet*() and glIsEnabled() commands. Further more, you
can read a rectangular area of pixel data from frame buffer using glReadPixels(),
and get fully transformed vertex data using glRenderMode(GL_FEEDBACK). glCopyPixels()
does not return pixel data to the specified system memory, but copy them back
to the another frame buffer, for example, from front buffer to back buffer.
g)OpenGL provides three basic commands
for manipulating image data, explain each briefly. [4]
OpenGL
provides three basic commands that manipulate image data:
glReadPixels() - Reads a rectangular
array of pixels from the framebuffer and stores the data in processor memory.
glDrawPixels() - Writes a rectangular array of pixels into the framebuffer from data kept in processor memory.
glCopyPixels() - Copies a rectangular array of pixels from one part of the framebuffer to another. This command behaves something like a call to glReadPixels() followed by a call to glDrawPixels(), but the data is never written into processor memory.
c) Define point, line and polygon w.r.t.
OpenGL [6]
A point, for example
(a single location defined by [x, y, z] coordinates), is defined by one vertex,
but often simply thought of as a simple 3D location in space. Points can make
excellent particle effects such as sparks, or dust particles glimmering as they
pass through the rays of light. Even though we are working with 3D graphics,
rendering a single point on the screen by itself creates an illusion of 2D space,
because our monitor screens are flat, or 2-dimensional and there is nothing to
indicate depth.
A line has only 2
vertices - which are its starting and its ending points; a line can be thought
of as two connected vertices in 3D space, if the two vertices are positioned in
the same exact [x,y,z] location, it can be thought of as a point, but almost
never used in that way. Lines are great for visual representations of the
concepts of physics, such as springs, as well as other interesting objects that
don't make sense to be drawn with points or polygons, such as electrical wires.
A polygon is a
3-Dimensional surface defined by 3 or more vertices. A triangle is, for
instance, a polygon with 3 vertices. A quad is not truly a
primitive, because in software it is always broken into two triangles anyway.
However, under the OpenGL implementation quads are treated as separate
primitives, as long as the two triangles they always consist of are coplanar.
The main function (and quite possibly the
most used OpenGL call) is the function named glVertex. This function defines a
point (or a vertex) in your 3D world and it can vary from receiving from 2 to
up to 4 coordinates.
glVertex2f(100.0f,
150.0f); defines a point at x = 100, y = 150, z = 0; this function takes only 2
parameters, z is always 0. glVertex2f can be used in special cases and won't be
used a lot unless you're working with pseudo-2D sprites or triangles and points
that always have to be constrained by the depth coordinate. glVertex3f(100.0f, 150.0f,
-25.0f); defines a point at x = 100, y = 150, z = -25.0f; this function takes 3
parameters, defining a fully 3D point in your world. This function will be used
a lot to define any kind of shapes you will possibly want. glVertex4f(100.0f,
150.0f, -25.0f, 1.0f); this is the same as glVertex3f, the only difference is
in the last coordinate that specifies a scaling factor. The scaling factor is
set to 1.0f by default.
These functions are glBegin( int mode );
and glEnd( void ); glBegin and glEnd delimit the vertices of a primitive or
a group of like primitives. What this means is that everytime you want to draw
a primitive on the screen you will first have to call glBegin, specifying what
kind of primitive it is that you want to draw in the mode parameter of glBegin,
and then list all vertices one by one (by sequentially calling glVertex) and
finally call glEnd to let OpenGL know that you're done drawing a primitive. The
parameter mode of the function glBegin can be one of the following: GL_POINTS
GL_LINES GL_LINE_STRIP GL_LINE_LOOP GL_TRIANGLES GL_TRIANGLE_STRIP
GL_TRIANGLE_FAN GL_QUADS GL_QUAD_STRIP GL_POLYGON These flags are
self-explanatory. As an example I want to show how to draw some primitives and
then you will be able to understand how to draw the rest of them.
// this code will draw a point located at
[100, 100, -25]
glBegin(GL_POINTS);
glVertex3f(100.0f, 100.0f, -25.0f);
glEnd( );
// next code will draw a line at starting
and ending coordinates specified by glVertex3f
glBegin(GL_LINES);
glVertex3f(100.0f, 100.0f, 0.0f); // origin
of the line
glVertex3f(200.0f, 140.0f, 5.0f); // ending
point of the line
glEnd( );
// the following code draws a triangle
glBegin(GL_TRIANGLES);
glVertex3f(100.0f, 100.0f, 0.0f);
glVertex3f(150.0f, 100.0f, 0.0f);
glVertex3f(125.0f, 50.0f, 0.0f);
glEnd( );
// this code will draw two lines "at a
time" to save
// the time it takes to call glBegin and
glEnd.
glBegin(GL_LINES);
glVertex3f(100.0f, 100.0f, 0.0f); // origin
of the FIRST line
glVertex3f(200.0f, 140.0f, 5.0f); // ending
point of the FIRST line
glVertex3f(120.0f, 170.0f, 10.0f); // origin
of the SECOND line
glVertex3f(240.0f, 120.0f, 5.0f); // ending
point of the SECOND line
glEnd( );
b) In OpenGL programming, explain how you
can specify lines with different widths and lines that are stippled in various
ways-dotted, dashed, drawn with alternating dots and dashes. [8]
Displaying Points, Lines, and Polygons
By default, a point is drawn as a single pixel on the
screen, a line is drawn solid and 1 pixel wide, and polygons are drawn solidly
filled in. The following paragraphs discuss the details of how to change these
default display modes.
Point Details
To control the size of a rendered point, use glPointSize() and
supply the desired size in pixels as the argument.
void glPointSize(GLfloat
size);
Sets the width in pixels for rendered points; size must be greater than
0.0 and by default is 1.0.
The actual collection of pixels on the screen that are
drawn for various point widths depends on whether antialiasing is enabled. (Antialiasing
is a technique for smoothing points and lines as they’re rendered; see
“Antialiasing” and “Point Parameters” in Chapter 6 for more detail.) If
antialiasing is disabled (the default), fractional widths are rounded to
integer widths, and a screen-aligned square region of pixels is drawn. Thus, if
the width is 1.0, the square is 1 pixel by 1 pixel; if the width is 2.0, the
square is 2 pixels by 2 pixels; and so on.
Line Details
With OpenGL, you can specify lines with different widths
and lines that are stippled
in various ways—dotted, dashed, drawn with alternating dots and dashes, and so
on.
Wide
Lines
void glLineWidth(GLfloat
width);
Sets the width, in pixels, for rendered lines; width must be greater than
0.0 and by default is 1.0.
Version 3.1 does not support values greater than 1.0, and
will generate a GL_INVALID_VALUE error if a value greater than 1.0 is
specified.
The actual rendering of lines is affected if either
antialiasing or multisampling is enabled. (See “Antialiasing Points or Lines”
on page 269 and “Antialiasing Geometric Primitives with Multisampling” on page
275.) Without antialiasing, widths of 1, 2, and 3 draw lines 1, 2, and 3 pixels
wide. With antialiasing enabled, noninteger line widths are possible, and
pixels on the boundaries are typically drawn at less than full intensity. As
with point sizes, a particular OpenGL implementation might limit the width of
non-antialiased lines to its maximum antialiased line width, rounded to the
nearest integer value. You can obtain the range of supported aliased line
widths by using GL_ALIASED_LINE_WIDTH_RANGE with glGetFloatv(). To
determine the supported minimum and maximum sizes of antialiased line widths,
and what granularity your implementation supports, call glGetFloatv(), with
GL_SMOOTH_LINE_WIDTH_RANGE and GL_SMOOTH_LINE_WIDTH_GRANULARITY.
With non-antialiased wide lines, the line width isn’t
measured perpendicular to the line. Instead, it’s measured in the y-direction if the
absolute value of the slope is less than 1.0; otherwise, it’s measured in the x-direction. The rendering
of an antialiased line is exactly equivalent to the rendering of a filled
rectangle of the given width, centered on the exact line.
Stippled
Lines
To make stippled (dotted or dashed) lines, you use the
command glLineStipple()
to define the stipple
pattern, and then you enable line stippling with glEnable().
glLineStipple(1, 0x3F07);
glEnable(GL_LINE_STIPPLE);
void glLineStipple(GLint
factor, GLushort
pattern);
Sets the current stippling pattern for lines. The pattern argument is a
16-bit series of 0s and 1s, and it’s repeated as necessary to stipple a given
line. A 1 indicates that drawing occurs, and a 0 that it does not, on a
pixel-by-pixel basis, beginning with the low-order bit of the pattern. The
pattern can be stretched out by using factor,
which multiplies each subseries of consecutive 1s and 0s. Thus, if three
consecutive 1s appear in the pattern, they’re stretched to six if factor is 2. factor is clamped to lie
between 1 and 256. Line stippling must be enabled by passing GL_LINE_STIPPLE to
glEnable();
it’s disabled by passing the same argument to glDisable().
Compatibility
Extension
glLineStipple
GL_LINE_STIPPLE
With the preceding example and the pattern 0x3F07 (which
translates to 0011111100000111 in binary), a line would be drawn with 3 pixels
on, then 5 off, 6 on, and 2 off. (If this seems backward, remember that the
low-order bit is used first.) If factor
had been 2, the pattern would have been elongated: 6 pixels on, 10 off, 12 on,
and 4 off. Figure 2-8 shows lines drawn with
different patterns and repeat factors. If you don’t enable line stippling,
drawing proceeds as if pattern
were 0xFFFF and factor
were 1. (Use glDisable()
with GL_LINE_STIPPLE to disable stippling.) Note that stippling can be used in
combination with wide lines to produce wide stippled lines.
)
One way to think of the stippling is that as the line is
being drawn, the pattern is shifted by 1 bit each time a pixel is drawn (or factor pixels are drawn,
if factor isn’t
1). When a series of connected line segments is drawn between a single glBegin() and glEnd(), the pattern
continues to shift as one segment turns into the next. This way, a stippling
pattern continues across a series of connected line segments. When glEnd() is executed,
the pattern is reset, and if more lines are drawn before stippling is disabled
the stippling restarts at the beginning of the pattern. If you’re drawing lines
with GL_LINES, the pattern resets for each independent line.
Example
2-5. Line Stipple Patterns: lines.c
#define
drawOneLine(x1,y1,x2,y2)
glBegin(GL_LINES);
glVertex2f((x1),(y1)); glVertex2f((x2),(y2)); glEnd();
void init(void)
{
glClearColor(0.0, 0.0, 0.0, 0.0);
glShadeModel(GL_FLAT);
}
void display(void)
{
int i;
glClear(GL_COLOR_BUFFER_BIT);
/* select white for all
lines */
glColor3f(1.0, 1.0, 1.0);
/* in 1st row, 3 lines,
each with a different stipple */
glEnable(GL_LINE_STIPPLE);
glLineStipple(1, 0x0101); /*
dotted */
drawOneLine(50.0, 125.0, 150.0, 125.0);
glLineStipple(1, 0x00FF); /*
dashed */
drawOneLine(150.0, 125.0, 250.0, 125.0);
glLineStipple(1, 0x1C47); /*
dash/dot/dash */
drawOneLine(250.0, 125.0, 350.0, 125.0);
/* in 2nd row, 3 wide
lines, each with different stipple */
glLineWidth(5.0);
glLineStipple(1, 0x0101); /*
dotted */
drawOneLine(50.0, 100.0, 150.0, 100.0);
glLineStipple(1, 0x00FF); /*
dashed */
drawOneLine(150.0, 100.0, 250.0, 100.0);
glLineStipple(1, 0x1C47); /*
dash/dot/dash */
drawOneLine(250.0, 100.0, 350.0, 100.0);
glLineWidth(1.0);
/* in 3rd row, 6 lines,
with dash/dot/dash stipple */
/* as part of a single
connected line strip */
glLineStipple(1, 0x1C47); /*
dash/dot/dash */
glBegin(GL_LINE_STRIP);
for (i = 0; i < 7; i++)
glVertex2f(50.0 + ((GLfloat) i * 50.0),
75.0);
glEnd();
/* in 4th row, 6
independent lines with same stipple */
for (i = 0; i < 6; i++) {
drawOneLine(50.0 + ((GLfloat) i * 50.0),
50.0,
50.0 + ((GLfloat)(i+1) *
50.0), 50.0);
}
/* in 5th row, 1 line, with
dash/dot/dash stipple */
/* and a stipple repeat
factor of 5 */
glLineStipple(5, 0x1C47); /*
dash/dot/dash */
drawOneLine(50.0, 25.0, 350.0, 25.0);
glDisable(GL_LINE_STIPPLE);
glFlush();
}
No comments:
Post a Comment
Note: Only a member of this blog may post a comment.